The Charleston Landfill is in the forest region of the map in Charleston, just north of the border with the Ash Heap. AVR Medical Center is to the northeast, and Poseidon Energy Plant is north across the river.
The Charleston Landfill is a workshop that you can claim for yourself. It is home to the following resources:
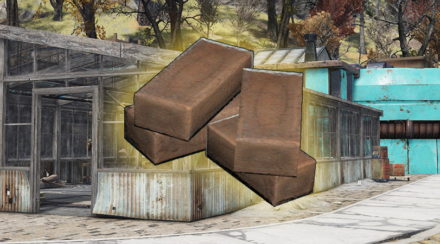
- 3 Junk Piles
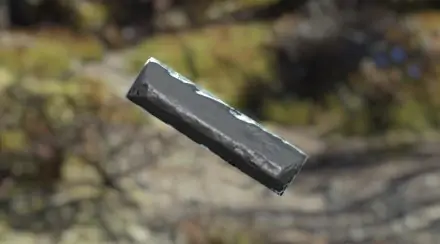
- 1 Steel
- 1 Aluminum
- 1 Copper
The biggest reason to claim this spot is the three junk piles. Once you’ve placed Junk Extractors, they will generate a large amount of scrap for you.
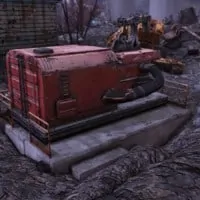
Claim Workshop at Charleston Landfill
As I said, the biggest draw to this workshop is easily the three junk piles here. To take advantage of the junk piles, you need to complete the Claim Workshop at Charleston Landfill quest.
There are two parts to the quest. Clear the location of any enemies that are here. Then actually claim the workshop once you have dealt with all the enemies.
The enemies in question here are Wild Mongrels. There will be up to five of them in and around the mobile homes near the workshop station itself. There will usually be two wild mongrels in the southern trailer, one in the northern building, and two outside between the workshop and water purifier.
Once they’re gone, you will be able to claim the workshop and begin building resource extractors. You should start building soon because it’ll only be a couple of minutes before you need to defend your newly claimed workshop.
Defend Charleston Landfill
As the proud new owner of the Charleston Landfill, you’ll find after a few minutes that there is a new threat to that ownership in the form of a new quest to Defend The Charleston Landfill.
This quest pits you against up to four waves of creatures that you must defeat, or they will begin destroying everything you’ve built.
As with my other workshop guides, I’ve completed the defense quest twenty-five times and recorded the results. The table below is the results.
| Creature | Avg # Waves | Avg # Per Wave | Chance of Creature |
|---|---|---|---|
| Wild Mongrels | 3 | 8.6 | 20% |
| Super Mutants | 2 | 7.6 | 16% |
| Mole Rats | 2 | 7.1 | 16% |
| Liberators | 3 | 6.8 | 12% |
| Scorched | 3 | 7.8 | 12% |
| Feral Ghouls | 2 | 8.8 | 12% |
| Robots | 2 | 7.2 | 12% |
You can see that you will be fighting a lot of Wild Mongrels. I can confirm that after completing these quests, my character was eating Mutt Chops for a week.
Plans For Claiming or Defending Charleston Landfill
Vasts quantities of Mutt Chops are not the only rewards for claiming or defending the Charleston Landfill. For each claim or defense of the landfill, you’ll also receive a random plan that will let you build things for your camp or workshops.
The chart below shows you which plans I received for claiming and defending the Charleston Landfill. I’ve kept the claim and defense quests separate even though I believe that they use the same loot tables for the plans.
Once I’ve completed guides for all the workshops, I’ll have a better idea of what the loot tables look like overall. I will, of course, take a look at all that data with you.
| Plan Name | Claim | Defense |
|---|---|---|
| Acoustic Instruments | 2 | 0 |
| Ashtray | 0 | 2 |
| Assorted Lights | 2 | 1 |
| Barn Building Set | 1 | 0 |
| Baseball Player Statue | 0 | 1 |
| Bathroom Toilet | 0 | 1 |
| Cigarette Machine | 1 | 0 |
| Daisy Rug | 1 | 0 |
| Dressers | 0 | 1 |
| Dumpster | 1 | 0 |
| Elegant Couches | 1 | 1 |
| Footlocker | 0 | 1 |
| Kitchen Stove | 1 | 0 |
| Lion Statues | 0 | 2 |
| Metal Diner Doors | 1 | 1 |
| Metal Shelves | 1 | 0 |
| Metal Tables | 0 | 1 |
| Military Cot | 0 | 1 |
| Modern Couches | 1 | 0 |
| Modern Paintings | 0 | 1 |
| Nuka-Cola Machine | 0 | 1 |
| Office Couches | 1 | 0 |
| Office Desk | 1 | 1 |
| Park Grill | 1 | 0 |
| Patio Table | 0 | 1 |
| Pianos | 1 | 0 |
| Picnic Table | 0 | 1 |
| Pool Table | 2 | 0 |
| Rug | 0 | 1 |
| Rug Set 2 | 2 | 0 |
| Single Display Shelf | 1 | 0 |
| Stone Fountain | 1 | 1 |
| Trashcan | 1 | 0 |
| Wind Instruments | 0 | 1 |
| Wood Tables | 0 | 2 |
| Wooden Patio Chair | 1 | 1 |
| Metal Signs | 0 | 1 |
Resources Available at Charleston Landfill
Now let’s get into the reason that you are likely here. It’s all about the junk baby! The Charleston Landfill is one of my favorite resource locations overall. The junk piles are the main attraction, but the copper, aluminum, and steel are super useful too.
As I go through these workshop guides, I’m finding that junk piles are weird. It seems that all the other extractors have a consistent capacity, but junk extractors don’t appear to follow that norm.

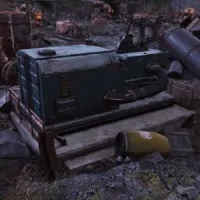
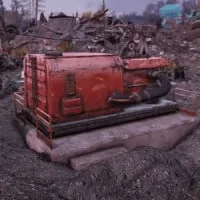
Junk Extractor at Charleston Landfill Aluminum Extractor at Charleston Landfill Copper Extractor at Charleston Landfill Steel Extractor at Charleston Landfill

The junk extractors here each maxed out at different quantities, with twenty-seven being the minimum and twenty-nine being the maximum. So I’m not sure if each has a different maximum or if individual junk is weighted differently to determine capacity.
The table below shows the maximum capacity for each resource extractor type along with the amount of time to hit that max. I went with the lowest max that I found for the junk extractors.
| Resource Name | Max Capacity | Time to Max Capacity | Time Per Unit |
|---|---|---|---|
| Junk Pile (3) | 27 | 1 hr 21 mins | 3 mins |
| Copper | 10 | 30 mins | 3 mins |
| Aluminum | 14 | 42 mins | 3 mins |
| Steel | 20 | 35 mins | 1 min 45 sec |
You should also note that the copper and aluminum extractors both output ore instead of scrap. That means you’re going to need to acid to break down the ore into actual useable copper and aluminum scrap.
Three units of aluminum ore require two units of acid to smelt down in a chemistry workbench to make two aluminum scrap.
The copper equation works out a little better, being a three to three ore to scrap ration, still only requiring two acid for the smelting process.
Build a Collectron For More Junk
One thing that many people myself included might not have thought of for ramping up the junk collection is to build a collectron at your workshops. You can get it from the Atom Shop for around five hundred Atoms, or they often give a Santa themed version away for free around Christmas. It turns out that not only can you make them in your camp, but you can build them in the workshops that you capture too.
They aren’t as effective at gathering junk as the extractors, but every little bit helps. They collect one unit every four minutes and forty-five seconds. They’re also not as big as the regular extractors, so they max out at twenty units before you need to empty your collectron station.
There is also something that ultimately feels very satisfying about having your junk robot running around an actual landfill collecting junk.
Conclusion
If junk is your thing, then the Charleston Landfill should be on your list of must-claim workshops. It’s a low-level location that any level of character can claim.
For new characters, it will help you start to build up the resources that you’re going to need throughout your adventures in Appalachia.
For more experienced characters, it keeps a nice flow of junk coming in that doesn’t require you to do much. Charleston Landfill is an excellent workshop location for any level.